Mirror Island Quick Start Guide

June 27, 2018
Mirror Island is a new kind of network designed to help you get your ideas and messages out to the world as quick as possible.
The best way to see how things work is by making your first post.
It doesn’t really matter what you put in it for now since you can edit any post you have made, or you can delete them altogether - so have fun!
Sign Up And Sign In (Optional)
It is recommended to sign up for an account and sign in before continuing.
As a registered user it will be easier to know which posts you have made and it enables additional features mentioned later in this quick start guide.
The sign up form is located on the right side of every page and looks like this:
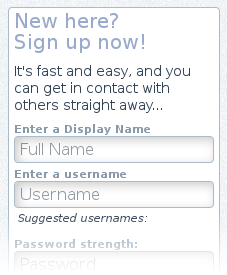
It literally takes a few seconds, and signing in is fast too!
Click here to go to the sign up page...
Once you have signed in you can return here and continue on to the next section.
Already have an account?

You can sign in at any time at the top-right of any page.
Start With A Post
Near the top of the page click on New Post and the button will transform in to a new, blank document.
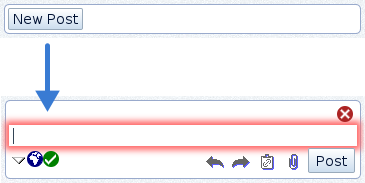
You can now start to write your first post!
The area highlighted in red is the editor window where you can type and add images. Surrounding the editor window are the editor controls.
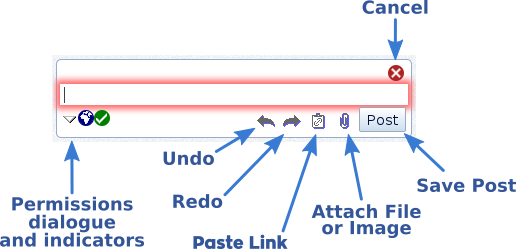
- Undo and Redo: Undo (or redo) changes before saving a post.
- Paste Link: Turn the selected text in to a link, or if no selection has been made a copy of the address itself will be inserted and linked.
- Attach File or Image: Images will be displayed in the editor window. Other files will be listed below the editor window as attachments.
Currently, only files up to 4MB in size are accepted. - Save Post: Saves the current post and closes the editor.
- Cancel: Undoes all changes and closes the editor.
- Permissions dialogue: Lets you control who can see the post.
A Quick Note On Permissions
You can specify permissions when you hover the mouse pointer over the icons on the bottom left.
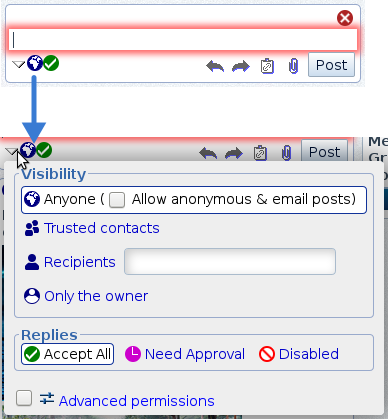
- Visibility: Who can see the post. This includes;
- Anyone: Everybody can see.
- Allow anonymous & email posts: With Anyone selected, users don’t have to be signed in to reply, or they can reply to this post by email.
- Trusted contacts: People you mark "Trusted" on your contact list.
- Recipients: People entered in the recipient field can see this.
- Only the owner: Only the owner can see this post. (This can be useful to save drafts for publishing later.)
- Replies: Permissions also apply to replies. They include;
- Accept All: All replies are displayed.
- Need Approval: Replies from other users are saved but they can only be visible when you approve them.
- Disabled: No replies are accepted.
Checking Advanced permissions will allow you to fine tune permissions (although that is an in-depth topic for another day.)
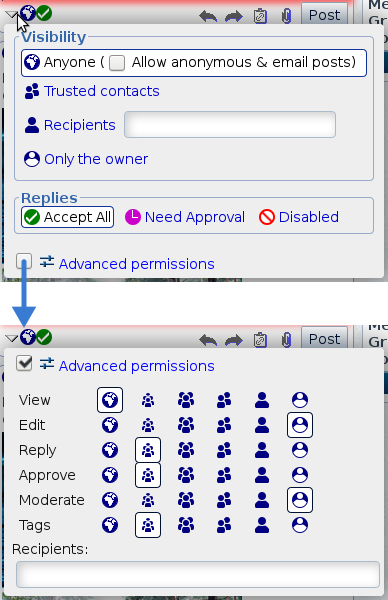
If you ever find yourself in advanced mode, click on Advanced permissions at the top to uncheck it and return to the quicker to use presets.
A prompt may show up letting you know presets will reset permissions - simply click OK to return to presets and continue editing.
Saving Your Post
Once you have finished typing in your post or uploading images or attachments, click on Post to save your post.
Details On Each Post
On each post only basic details are shown for faster browsing. An example post is shown below:
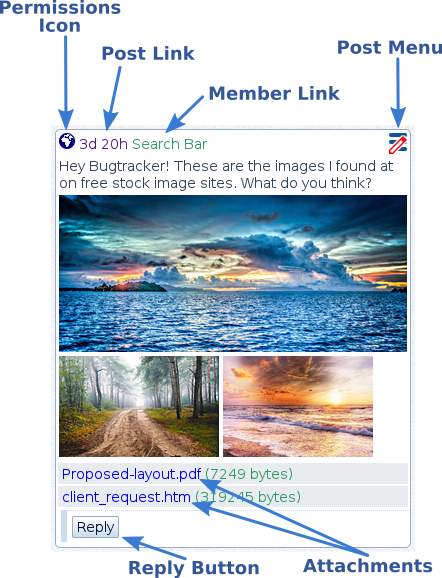
By hovering the mouse over these details you can find out more information about the post including who and when it was posted, and its permissions.
- Permissions Icon: An icon displaying who can see this post. The icon used here is the same one selected in the permissions box during editing.
- Post Link: A link to the post’s page showing a shortened form of when the post was made. In the above example 3d 20h means 3 days and 20 hours ago.
- Member Link: A multipurpose link that can display information about the author of the post and how to contact them.
- Post Menu: A popup menu with the options to share, edit, or delete the post. Only posts you can edit will have a "red pen" icon displayed.
- Attachments: Links to other files attached to this post. Click the attachment’s link to download (or use the right-click menu if needed.)
- Reply Button: Starts a new post in reply to the above post. This is only shown if the post accepts replies. If a reply neeeds approval, a small clock icon will be displayed in the Reply button.

The Permissions Icon Popup
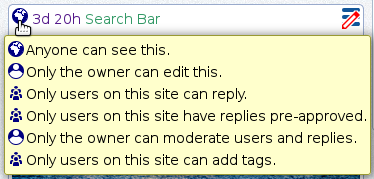
A description of a post’s permissions can be found in the popup for the permission icon.
The Post Link Popup
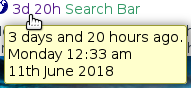
After the permission icon is the post link which shows in detail when the post was made. Also, it is the link to the post’s own page.
The Member Link Popup
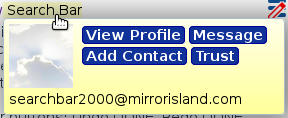
After the post link is the name of the author displayed as a member link. The popup for this shows a few options on how to contact them.
At the bottom of the popup is the member’s handle and looks like an email address; this is what goes in the Recipients field in the permissions popup.
The other options in the member link popup include:
- View Profile: A link to the profile page of the member.
- Message: Opens a popup window to send a quick post (message) to the member.
- Add Contact: If you have signed in you can add this person to an address book on the side of the window.
- Trust: Add this member as a trusted contact to your address book. You will need to be signed in to also see this feature.
The Post Menu
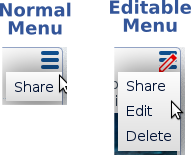
The menu for each post can be accessed through the menu icon in the top right of the post. With all posts you can see, you are able to:
- Flag Post: If the post contains inapproprate or offensive material, the post can be removed from view.
- Share...: Send a copy of the post by email or through a social network.
In addition to the above menu item, posts you can edit will have a "red pen" in its post menu icon. That way, you can quickly tell the difference between posts you can edit (Editable menu) and those you can’t (Normal menu).
The additional options available are:
- Edit: The post will become editable with the edit controls reappearing around the post.
- Delete: Delete the post and any photos or attachments saved with it. Deleting is immediate and permanent, so choose wisely when doing this!
Wrapping Up This Quickstart Guide
This concludes the quick start guide for now.
Now that you know enough to start writing posts, sharing photos and uploading attachments, you can also explore the other features Mirror Island has to offer! These include:
- Using the search bar located at the top
- Making image galleries by uploading multiple images in the one post
- Using groups
- Managing your contact list
- Sending and recieving emails
And other upcoming features that are in development!